Confession: I’m a huge stan of Martha Stewart. I used to hoard all her magazines growing up and could spend hours flipping through the pages. She has this inner toughness mixed with femininity that I admire. Not to mention all those amazing crafts! I’ve always found crafting fun and relaxing, especially when the items you make, like these Halloween masks, are pretty and usable.
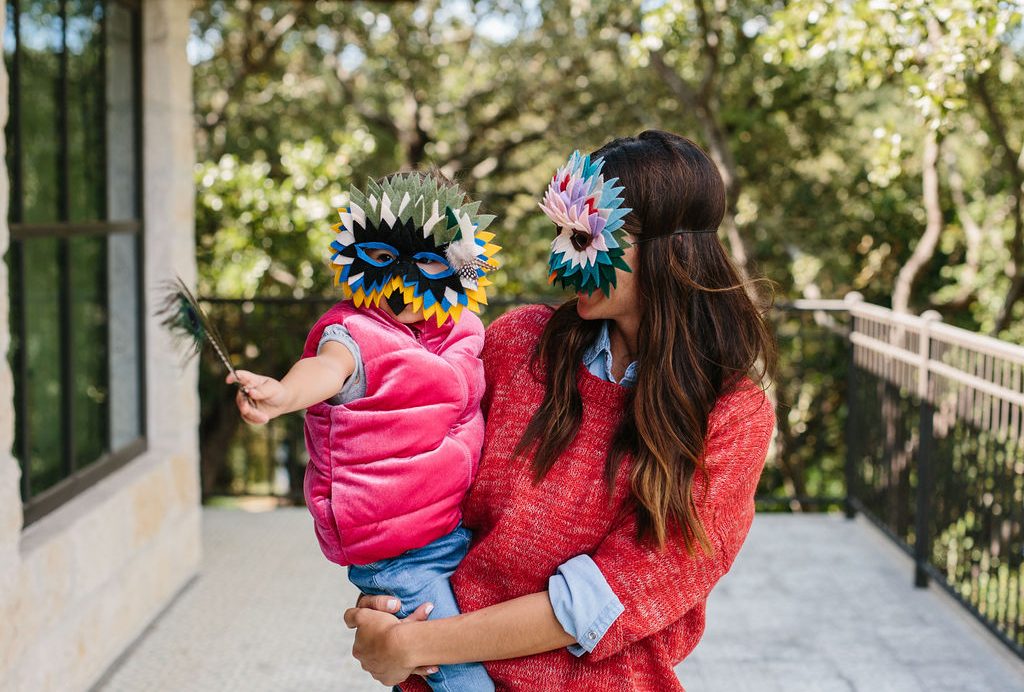
My friend Virginia Davidson saw these DIY feathered Halloween masks on Creative Bug and suggested them to me as an activity to do with the kids. They were a huge hit and a fun way for me to channel my inner Martha.
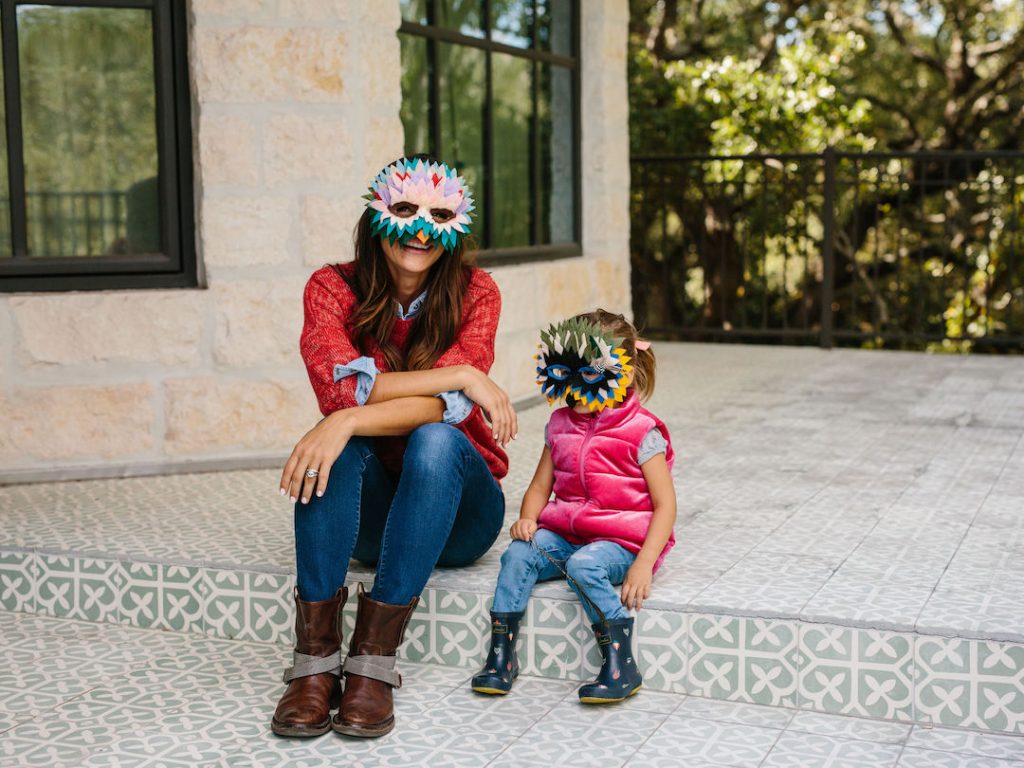
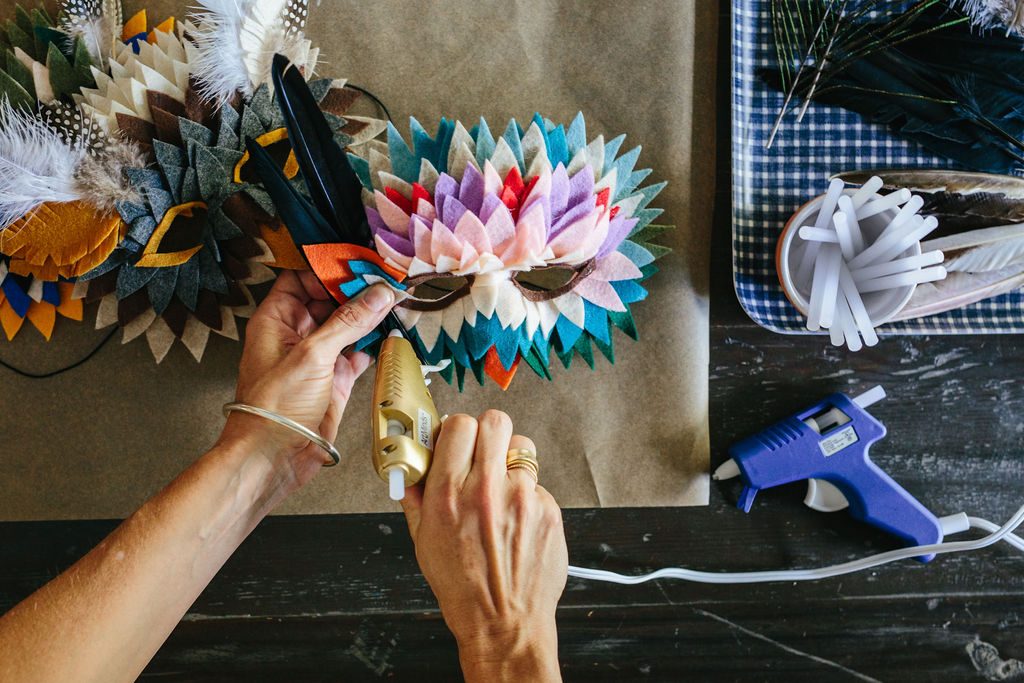
When doing this craft with kids, you will need to be careful of burning little fingers (yours included) with hot glue. But the gorgeous end result is well worth it.
Keep reading for a step-by-step guide to make your own DIY feathered Halloween masks. And let me know how you feel about crafting with your kids (crazy fun or crazy stressful?) in the comments!
What You’ll Need
- store bought white or black masks
- hot glue gun
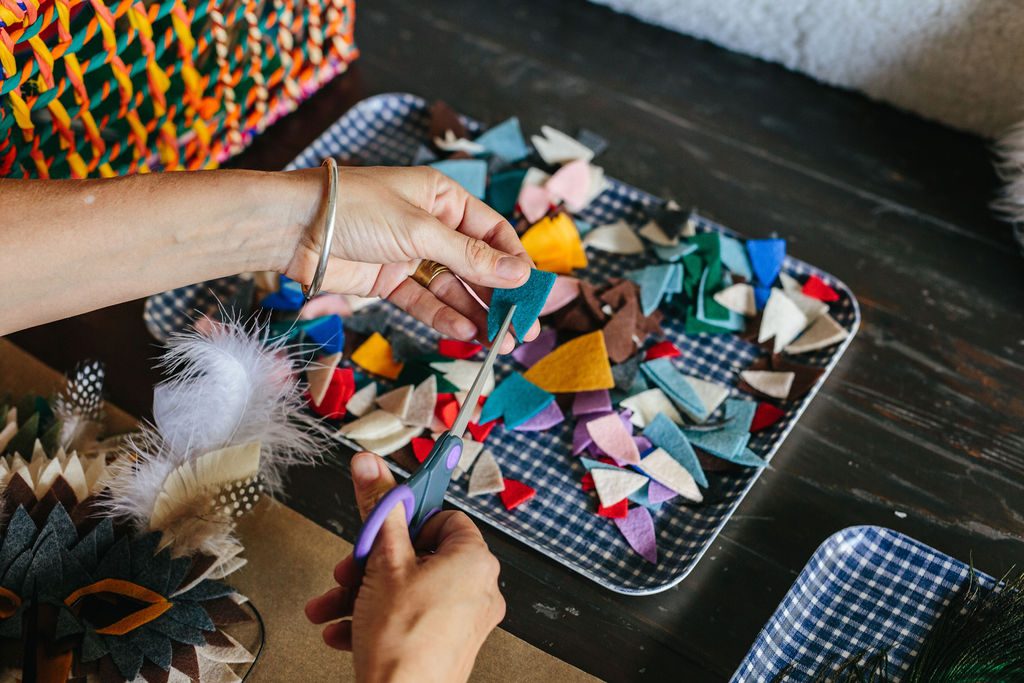
- scissors
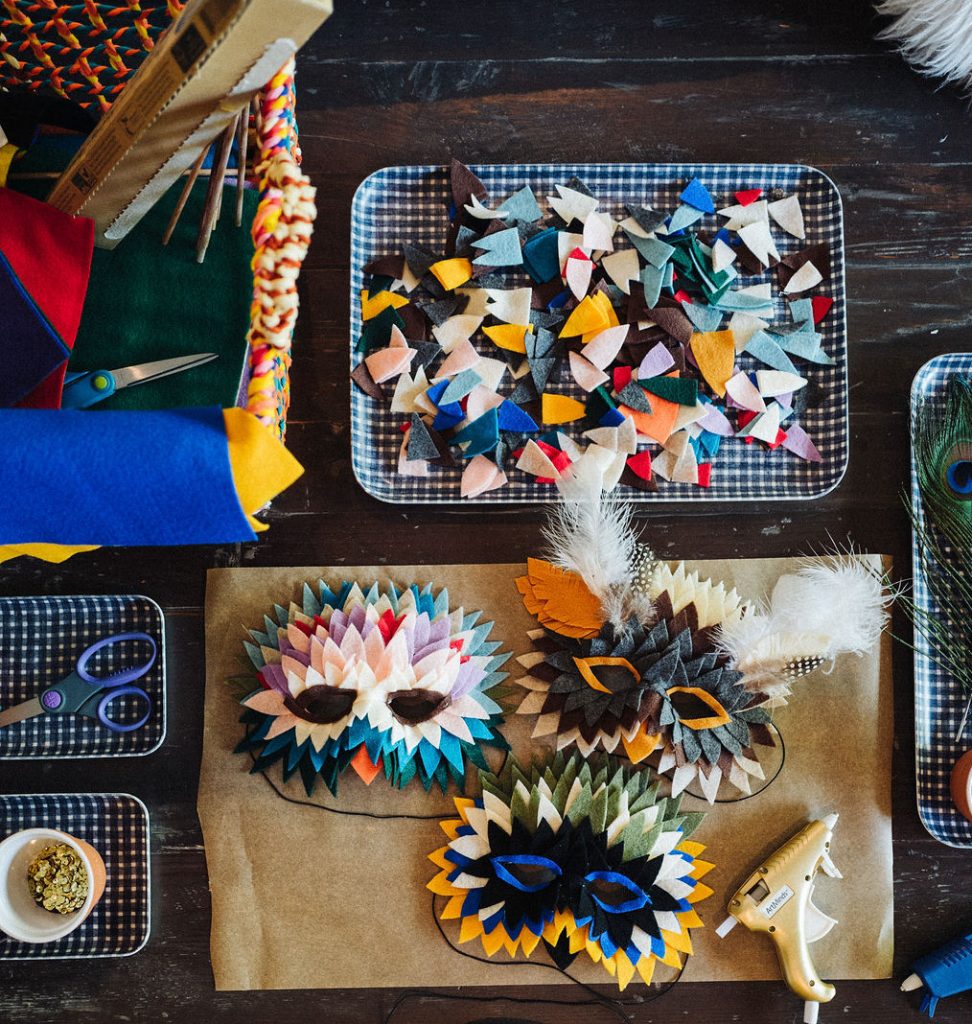
- craft felt in a variety of colors
- loose feathers
Step 1
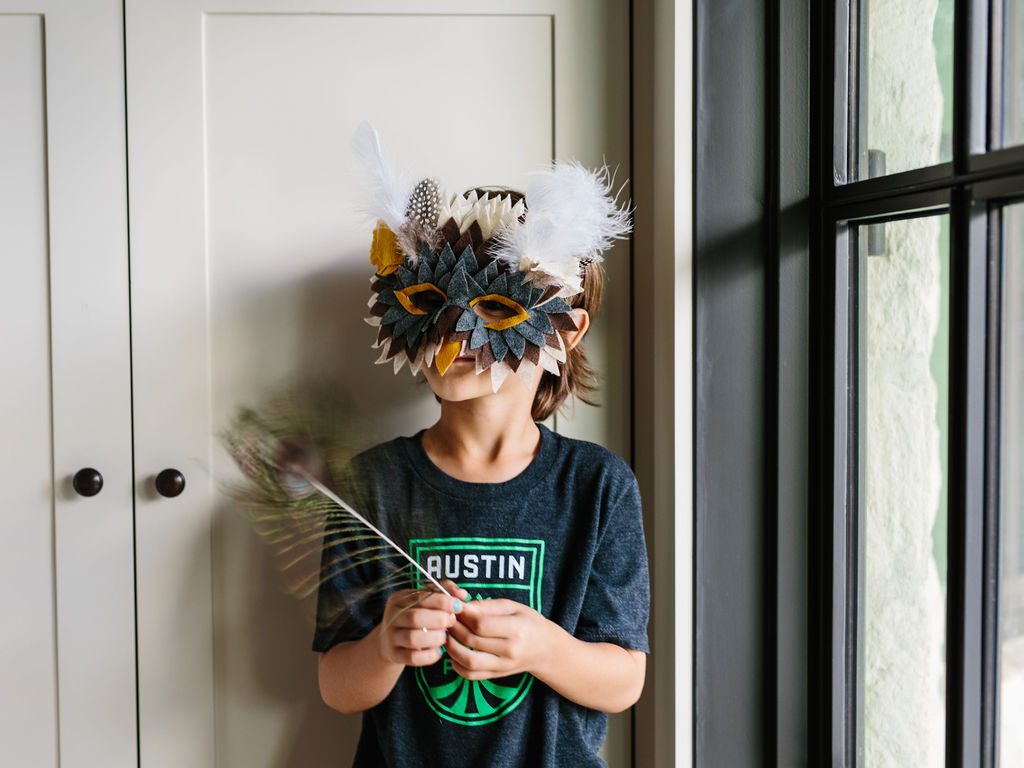
Pick three or four felt colors. (For an owl, select colors in shades of cream, brown, and gray, and start your project by gluing a beak under the bridge of the mask’s nose.) Cut each color into 20 to 30 rounded, inch-long rectangles. (Pro tip: It’s better to cut the feathers longer; you can always shorten them, but you can’t add length back on.)
Step 2
Once you have your piles of colors, decide which one you want to apply first. Put hot glue directly onto the bottom of the mask, from the nose to the outside of the cheek, and then apply same color feathers side-by-side in a line. Don’t worry about imperfections—you can always cover them with the next layer of feathers.
Step 3
Do the same thing with the second and third colors, again working your way from the nose to the outside of the cheek. By the third color, you should have reached the eye hole. Repeat the same process on the other side of the masks, working from the nose to the opposite outer cheek.
Step 4
Flip the mask and apply feathers in the same way, working from the outside in.
Step 5
Once feathers are all glued on, cut thin strips of an accent color to apply around the eye holes. You can also add pops of color by adding eyebrows, eyelashes, or ears—or use real feathers to give texture and height to your mask. Have fun with it!
Step 6
Slip on your new mask and rock it while trick-or-treating with your kids or attending a Halloween bash.

4 Comments
michaela kilbride
Hi Gen 🙂
Hope you enjoyed your wilderness adventure.
I love Halloween!!! I don’t have any littles (I pray one day soon) but I have two nieces and nephews who I adore. I love doing these kinds of craft activities with them even when moments get stressful,, I still love it and them 🙂 Chaos in a kind, collaborative, safe and fun environment is my favorite thing in the world. I am a teacher and break for Halloween on Friday. I will be sure to follow this guide. Even though I am in the UK, I have seen the exact materials your masks are made of, especially the pink one!! So I will be sure to stock up. Thank you for sharing your world as always xxxx
Jessie Hubbard
I LOVE these and will absolutely have to make them with my niece and nephew! Thank you for the idea! Thank Crafting is such a calming activity for me and I love crafting with little ones. It’s so fun to watch their creativity bloom!
Neicha Marte
I love you creativity with the kids
Robin Tomblin
I admire your commitment to nature.I don’t think there is anything more inspiring than to teach your children to respect and honor and appreciate all the beautiful life around us..